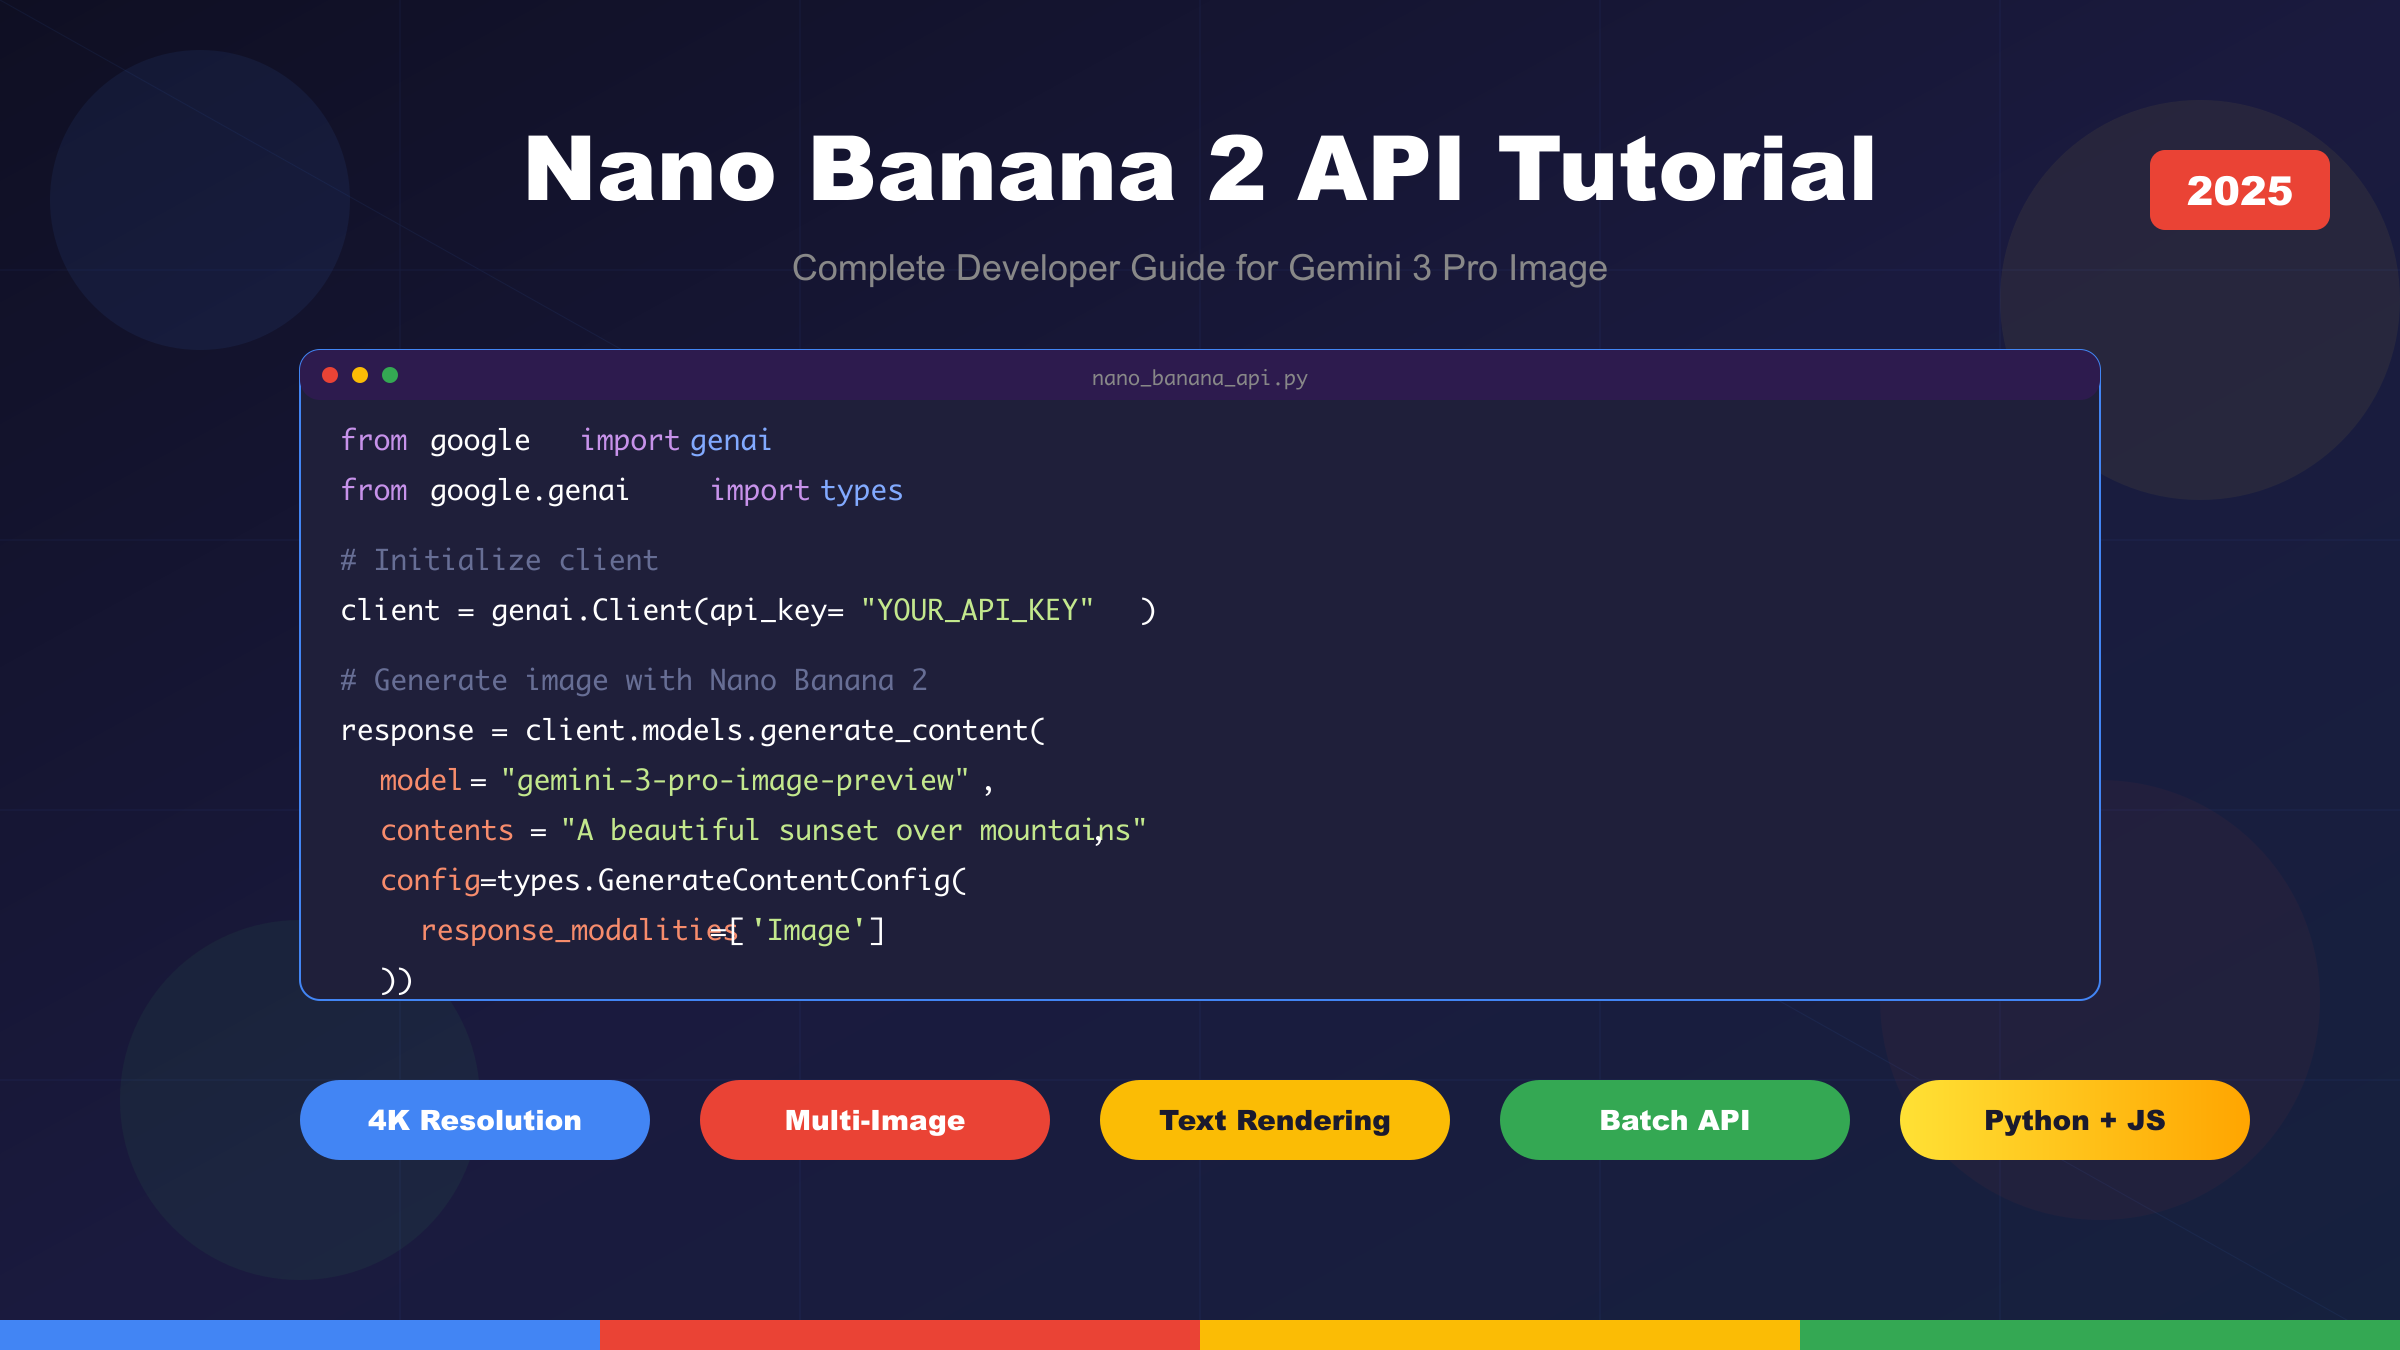
Nano Banana 2 API Tutorial: Complete Developer Guide for Gemini 3 Pro Image [2025]
Master Nano Banana 2 (Gemini 3 Pro Image) API with this comprehensive tutorial. Learn setup, configuration, image generation, editing features, and production best practices with real Python code examples.
Nano Banana Pro
4K图像官方2折Google Gemini 3 Pro Image · AI图像生成
已服务 10万+ 开发者
Introduction
The release of Nano Banana 2, officially known as Gemini 3 Pro Image, marks a significant advancement in AI image generation technology. This powerful API from Google DeepMind combines state-of-the-art image synthesis with intuitive developer tooling, making it one of the most capable image generation APIs available today.
Understanding the Nano Banana naming convention helps clarify the ecosystem. The original Nano Banana refers to Gemini 2.5 Flash Image, a lightweight model optimized for speed and cost efficiency. Nano Banana 2 (also called Nano Banana Pro) represents the next generation powered by Gemini 3 Pro Image, offering studio-quality output with advanced features like 4K resolution, multi-character consistency, and enhanced text rendering. Both models share the same fundamental API structure, making migration straightforward once you understand the basics.
This tutorial provides a comprehensive guide for developers who want to integrate Nano Banana 2 into their applications. Whether you are building an e-commerce platform that needs product image generation, a content management system requiring automated visuals, or a creative tool for designers, this guide covers everything from initial setup to production deployment. We will explore the complete API surface, demonstrate practical code examples in Python and JavaScript, and share optimization strategies learned from real-world implementations.
API Overview and Access
The Nano Banana 2 API operates within Google's Gemini ecosystem, accessible through multiple channels depending on your deployment requirements. Understanding these access methods and their tradeoffs helps you make informed architectural decisions before writing any code.
Model Identification
Google provides two distinct model endpoints for image generation. The model ID gemini-2.5-flash-image-preview corresponds to the original Nano Banana, optimized for high-throughput scenarios where speed matters more than maximum quality. For production applications requiring the highest fidelity output, use gemini-3-pro-image-preview, which represents Nano Banana 2 with its full feature set including 4K resolution support and advanced composition capabilities.
The naming reflects real capability differences. Gemini 2.5 Flash Image processes requests significantly faster with lower latency, typically completing in 2-3 seconds. Gemini 3 Pro Image takes slightly longer at 4-8 seconds but delivers noticeably sharper details, more accurate text rendering, and better handling of complex multi-element scenes. Choose based on your application's specific requirements rather than defaulting to the newest version.
Access Channels
Google AI Studio serves as the primary entry point for most developers. This platform provides a generous free tier with 500 requests per day and 250,000 tokens per minute, making it ideal for development, testing, and small-scale production workloads. The API key you generate here works with the standard Gemini API endpoints and requires minimal setup.
Vertex AI targets enterprise deployments with requirements for enhanced security, compliance certifications, and dedicated infrastructure. While the API surface remains largely identical, Vertex AI integrates with Google Cloud's IAM system, supports VPC Service Controls, and provides enterprise SLAs. The pricing model differs slightly, using a pay-as-you-go structure tied to your Google Cloud billing account.
Pricing Structure
Understanding the cost structure helps you budget effectively and optimize for cost efficiency. The Nano Banana API prices output based on token consumption, with each generated image consuming approximately 1290 output tokens regardless of resolution.
| Tier | Input Tokens (per 1M) | Output Tokens (per 1M) | Per Image (1024x1024) |
|---|---|---|---|
| Standard API | $0.15 | $30.00 | $0.039 |
| Batch API | $0.075 | $15.00 | $0.020 |
| Free Tier | Free | Free | Free (500/day limit) |
The Batch API deserves special attention for high-volume workloads. By submitting requests in batches rather than individually, you receive a 50% discount on token costs. The tradeoff involves higher latency, as batch jobs process asynchronously rather than returning immediate responses. For applications like catalog generation, marketing asset creation, or batch processing pipelines, this optimization can significantly reduce operational costs.
Obtaining Your API Key
Creating an API key through Google AI Studio takes just a few steps, though the process requires a Google account with access to supported regions. Navigate to Google AI Studio, sign in with your Google account, and locate the API Keys section in the left navigation. Click "Create API Key" and select whether to create a key for a new or existing Google Cloud project. The generated key appears immediately and should be stored securely.
Security best practices dictate never hardcoding API keys in source code or committing them to version control. Instead, use environment variables or secret management systems. For local development, a .env file works well when combined with libraries like python-dotenv that load these values automatically. Production deployments should leverage secret managers like Google Secret Manager, AWS Secrets Manager, or HashiCorp Vault depending on your infrastructure.
Environment Setup
Configuring your development environment properly establishes a foundation for productive work with the Nano Banana 2 API. This section covers both Python and Node.js setups, as these represent the most common choices for API integration work.
Python Environment
The official Google Generative AI SDK provides the cleanest interface for Python developers. Install it using pip with standard dependency management practices.
bash# Create a virtual environment for isolation
python -m venv nano-banana-env
source nano-banana-env/bin/activate # On Windows: nano-banana-env\Scripts\activate
# Install required packages
pip install google-generativeai pillow python-dotenv
The pillow library handles image processing operations like saving generated images to disk and format conversion. While not strictly required for API calls, you will need it for any practical application that works with the generated output. The python-dotenv package enables loading environment variables from a .env file during development.
Create your environment configuration file in the project root:
bash# .env file - never commit this to version control
GOOGLE_API_KEY=your_api_key_here
Verify your installation with a quick connectivity test that validates both the SDK installation and API key configuration:
pythonimport os
from dotenv import load_dotenv
from google import genai
load_dotenv()
client = genai.Client(api_key=os.getenv('GOOGLE_API_KEY'))
print("SDK initialized successfully!")
print(f"Available models: {[m.name for m in client.models.list() if 'image' in m.name.lower()]}")
Node.js Environment
JavaScript developers can access the same functionality through the Google AI SDK for Node.js. The setup follows familiar patterns for Node.js projects.
bash# Initialize a new project
mkdir nano-banana-project && cd nano-banana-project
npm init -y
# Install dependencies
npm install @google/generative-ai dotenv
Create the equivalent environment configuration:
javascript// config.js
import dotenv from 'dotenv';
import { GoogleGenerativeAI } from '@google/generative-ai';
dotenv.config();
const genAI = new GoogleGenerativeAI(process.env.GOOGLE_API_KEY);
export default genAI;
IDE Configuration Recommendations
Modern development environments enhance productivity significantly when properly configured. For Visual Studio Code, install the Python extension along with Pylance for type checking, which helps catch configuration errors before runtime. Enable automatic linting with flake8 or ruff to maintain code quality.
Create a VS Code settings file specific to your project that points to your virtual environment:
json{
"python.defaultInterpreterPath": "./nano-banana-env/bin/python",
"python.analysis.typeCheckingMode": "basic"
}
Basic Image Generation
With your environment configured, generating your first image requires just a few lines of code. This section walks through the fundamental API patterns you will use throughout your integration work.
Text-to-Image Generation
The simplest use case involves generating an image from a text prompt. The API accepts natural language descriptions and returns image data that you can save or process further.
pythonfrom google import genai
from google.genai import types
from PIL import Image
from io import BytesIO
import os
from dotenv import load_dotenv
load_dotenv()
client = genai.Client(api_key=os.getenv('GOOGLE_API_KEY'))
prompt = "A professional product photograph of a sleek wireless headphone on a minimalist white background, studio lighting, high resolution"
response = client.models.generate_content(
model="gemini-2.5-flash-image-preview",
contents=prompt,
config=types.GenerateContentConfig(
response_modalities=['Image']
)
)
# Extract and save the generated image
for part in response.candidates[0].content.parts:
if part.inline_data is not None:
image = Image.open(BytesIO(part.inline_data.data))
image.save("generated_headphone.png")
print(f"Image saved: {image.size} pixels")
Several details in this code deserve explanation. The response_modalities configuration tells the API to return only image content, suppressing any text commentary that might otherwise accompany the response. This clean output simplifies parsing and reduces token consumption.
The response structure contains candidates, each with content parts. A successful image generation produces exactly one inline_data part containing the raw image bytes. The PIL library handles parsing these bytes into a usable image object that you can save in various formats.
Understanding the Response Structure
The API response follows a structured format that accommodates both text and image modalities. Examining this structure helps you build robust parsing logic.
python# Inspecting the full response structure
print(f"Candidates count: {len(response.candidates)}")
print(f"Parts count: {len(response.candidates[0].content.parts)}")
for i, part in enumerate(response.candidates[0].content.parts):
if part.text:
print(f"Part {i}: Text - {part.text[:100]}...")
if part.inline_data:
print(f"Part {i}: Image - {part.inline_data.mime_type}")
When you omit the response_modalities configuration or set it to ['Text', 'Image'], the API may return both descriptive text about the generated image and the image itself. This behavior proves useful for debugging prompts or understanding how the model interprets your requests.
Prompt Engineering Fundamentals
Effective prompts dramatically influence output quality. The Nano Banana models respond well to structured prompts that specify key visual elements explicitly.
A well-constructed prompt typically includes several components. Subject description defines what appears in the image with specific details about appearance, materials, and proportions. Style specification indicates the artistic approach, whether photorealistic, illustrated, rendered in a particular art style, or following specific aesthetic conventions. Composition guidance describes framing, camera angle, and spatial relationships between elements. Technical parameters like lighting conditions, depth of field, and resolution targets help achieve specific visual outcomes.
Consider the difference between these prompts:
python# Vague prompt - unpredictable results
prompt_weak = "a dog"
# Detailed prompt - consistent, professional output
prompt_strong = """
A golden retriever puppy sitting in a sunlit meadow,
soft natural lighting from the left side,
shallow depth of field blurring the grass background,
fur details visible, warm color palette,
professional pet photography style,
shot at eye level, centered composition
"""
The model handles complex multi-element scenes particularly well when you maintain clear logical structure. For related elements, describe their spatial relationships explicitly. For scenes with multiple characters or objects, consider the composition as a whole rather than listing elements independently.
JavaScript Implementation
The equivalent implementation in JavaScript follows similar patterns with minor syntactic differences:
javascriptimport { GoogleGenerativeAI } from '@google/generative-ai';
import fs from 'fs';
import dotenv from 'dotenv';
dotenv.config();
const genAI = new GoogleGenerativeAI(process.env.GOOGLE_API_KEY);
async function generateImage(prompt) {
const model = genAI.getGenerativeModel({
model: "gemini-2.5-flash-image-preview",
generationConfig: {
responseModalities: ['Image']
}
});
const result = await model.generateContent(prompt);
const response = result.response;
for (const part of response.candidates[0].content.parts) {
if (part.inlineData) {
const imageBuffer = Buffer.from(part.inlineData.data, 'base64');
fs.writeFileSync('generated_image.png', imageBuffer);
console.log('Image saved successfully');
}
}
}
generateImage("A futuristic city skyline at sunset, cyberpunk aesthetic");
The asynchronous nature of JavaScript makes it natural to handle API calls with async/await syntax. Error handling becomes especially important in production code where network failures and rate limits require graceful degradation.
Advanced Configuration
The Nano Banana 2 API provides extensive configuration options that enable fine-grained control over generated output. Mastering these settings unlocks the full potential of the model for specific use cases.
Aspect Ratio Configuration
Image aspect ratio significantly impacts how generated content fits into your application's design. The API supports ten distinct aspect ratios, covering common formats from square social media posts to ultra-wide cinematic compositions.
| Aspect Ratio | Common Use Case | Resolution Example |
|---|---|---|
| 1:1 | Social media squares, avatars | 1024×1024 |
| 4:3 | Traditional photography, presentations | 1024×768 |
| 3:4 | Portrait photography, mobile screens | 768×1024 |
| 16:9 | YouTube thumbnails, widescreen displays | 1920×1080 |
| 9:16 | Instagram/TikTok stories, vertical video | 1080×1920 |
| 3:2 | Classic photography, prints | 1200×800 |
| 2:3 | Tall posters, book covers | 800×1200 |
| 4:5 | Instagram portrait posts | 1080×1350 |
| 5:4 | Large format photography | 1350×1080 |
| 21:9 | Ultra-wide cinematic | 2520×1080 |
Configuring aspect ratio requires specifying the imageConfig parameter in your request:
pythonfrom google import genai
from google.genai import types
response = client.models.generate_content(
model="gemini-3-pro-image-preview",
contents="A panoramic mountain landscape at golden hour",
config=types.GenerateContentConfig(
response_modalities=['Image'],
image_config=types.ImageConfig(
aspect_ratio="21:9"
)
)
)
The model adapts composition naturally to different aspect ratios. A portrait prompt rendered in 16:9 will emphasize the environment and context, while the same prompt in 9:16 focuses tightly on the subject. Consider your target platform's requirements when selecting ratios, and test with representative prompts to understand how your content adapts.
Resolution and Quality Settings
Nano Banana 2 introduces resolution control absent in the original model. The image_size parameter accepts three values, each representing a quality tier with distinct characteristics.
The 1K setting generates images at approximately 1024 pixels on the longest side, balancing quality with processing speed. This tier suits applications prioritizing throughput over maximum fidelity, such as thumbnail generation or rapid prototyping. Processing completes in 3-5 seconds typically.
The 2K setting doubles the resolution to approximately 2048 pixels, revealing significantly more detail in textures and fine elements. This middle tier works well for web-sized hero images, product photos destined for e-commerce listings, and marketing materials viewed at moderate sizes. Expect processing times of 5-8 seconds.
The 4K setting produces images at approximately 4096 pixels on the longest side, suitable for print production, large-format displays, and applications requiring exceptional detail. This premium tier demands longer processing times of 8-15 seconds and higher token consumption. Reserve it for final production assets rather than iterative development.
python# 4K generation for print-quality output
response = client.models.generate_content(
model="gemini-3-pro-image-preview",
contents="Detailed botanical illustration of a rose, scientific accuracy",
config=types.GenerateContentConfig(
response_modalities=['Image'],
image_config=types.ImageConfig(
aspect_ratio="3:4",
image_size="4K"
)
)
)
Batch Processing for Cost Efficiency
High-volume workloads benefit substantially from the Batch API, which offers 50% cost reduction in exchange for asynchronous processing. The Batch API accepts arrays of requests, processes them in parallel on Google's infrastructure, and returns results through a polling mechanism or webhook callback.
pythonfrom google import genai
from google.genai import types
import json
# Prepare batch requests
batch_requests = [
{"contents": "Product photo: red sneakers on white background"},
{"contents": "Product photo: blue sneakers on white background"},
{"contents": "Product photo: black sneakers on white background"},
]
# Submit batch job
batch_job = client.batches.create(
model="gemini-2.5-flash-image-preview",
requests=batch_requests,
config=types.GenerateContentConfig(
response_modalities=['Image']
)
)
print(f"Batch job ID: {batch_job.name}")
print(f"Status: {batch_job.state}")
# Poll for completion
import time
while batch_job.state != "COMPLETED":
time.sleep(30)
batch_job = client.batches.get(batch_job.name)
print(f"Status: {batch_job.state}")
# Retrieve results
results = client.batches.get_results(batch_job.name)
for i, result in enumerate(results):
# Process each generated image
save_image(result, f"batch_output_{i}.png")
Batch processing suits catalog generation, A/B testing variations, and any workflow where immediate response is not required. The tradeoff involves implementing polling logic and handling potential partial failures within a batch.
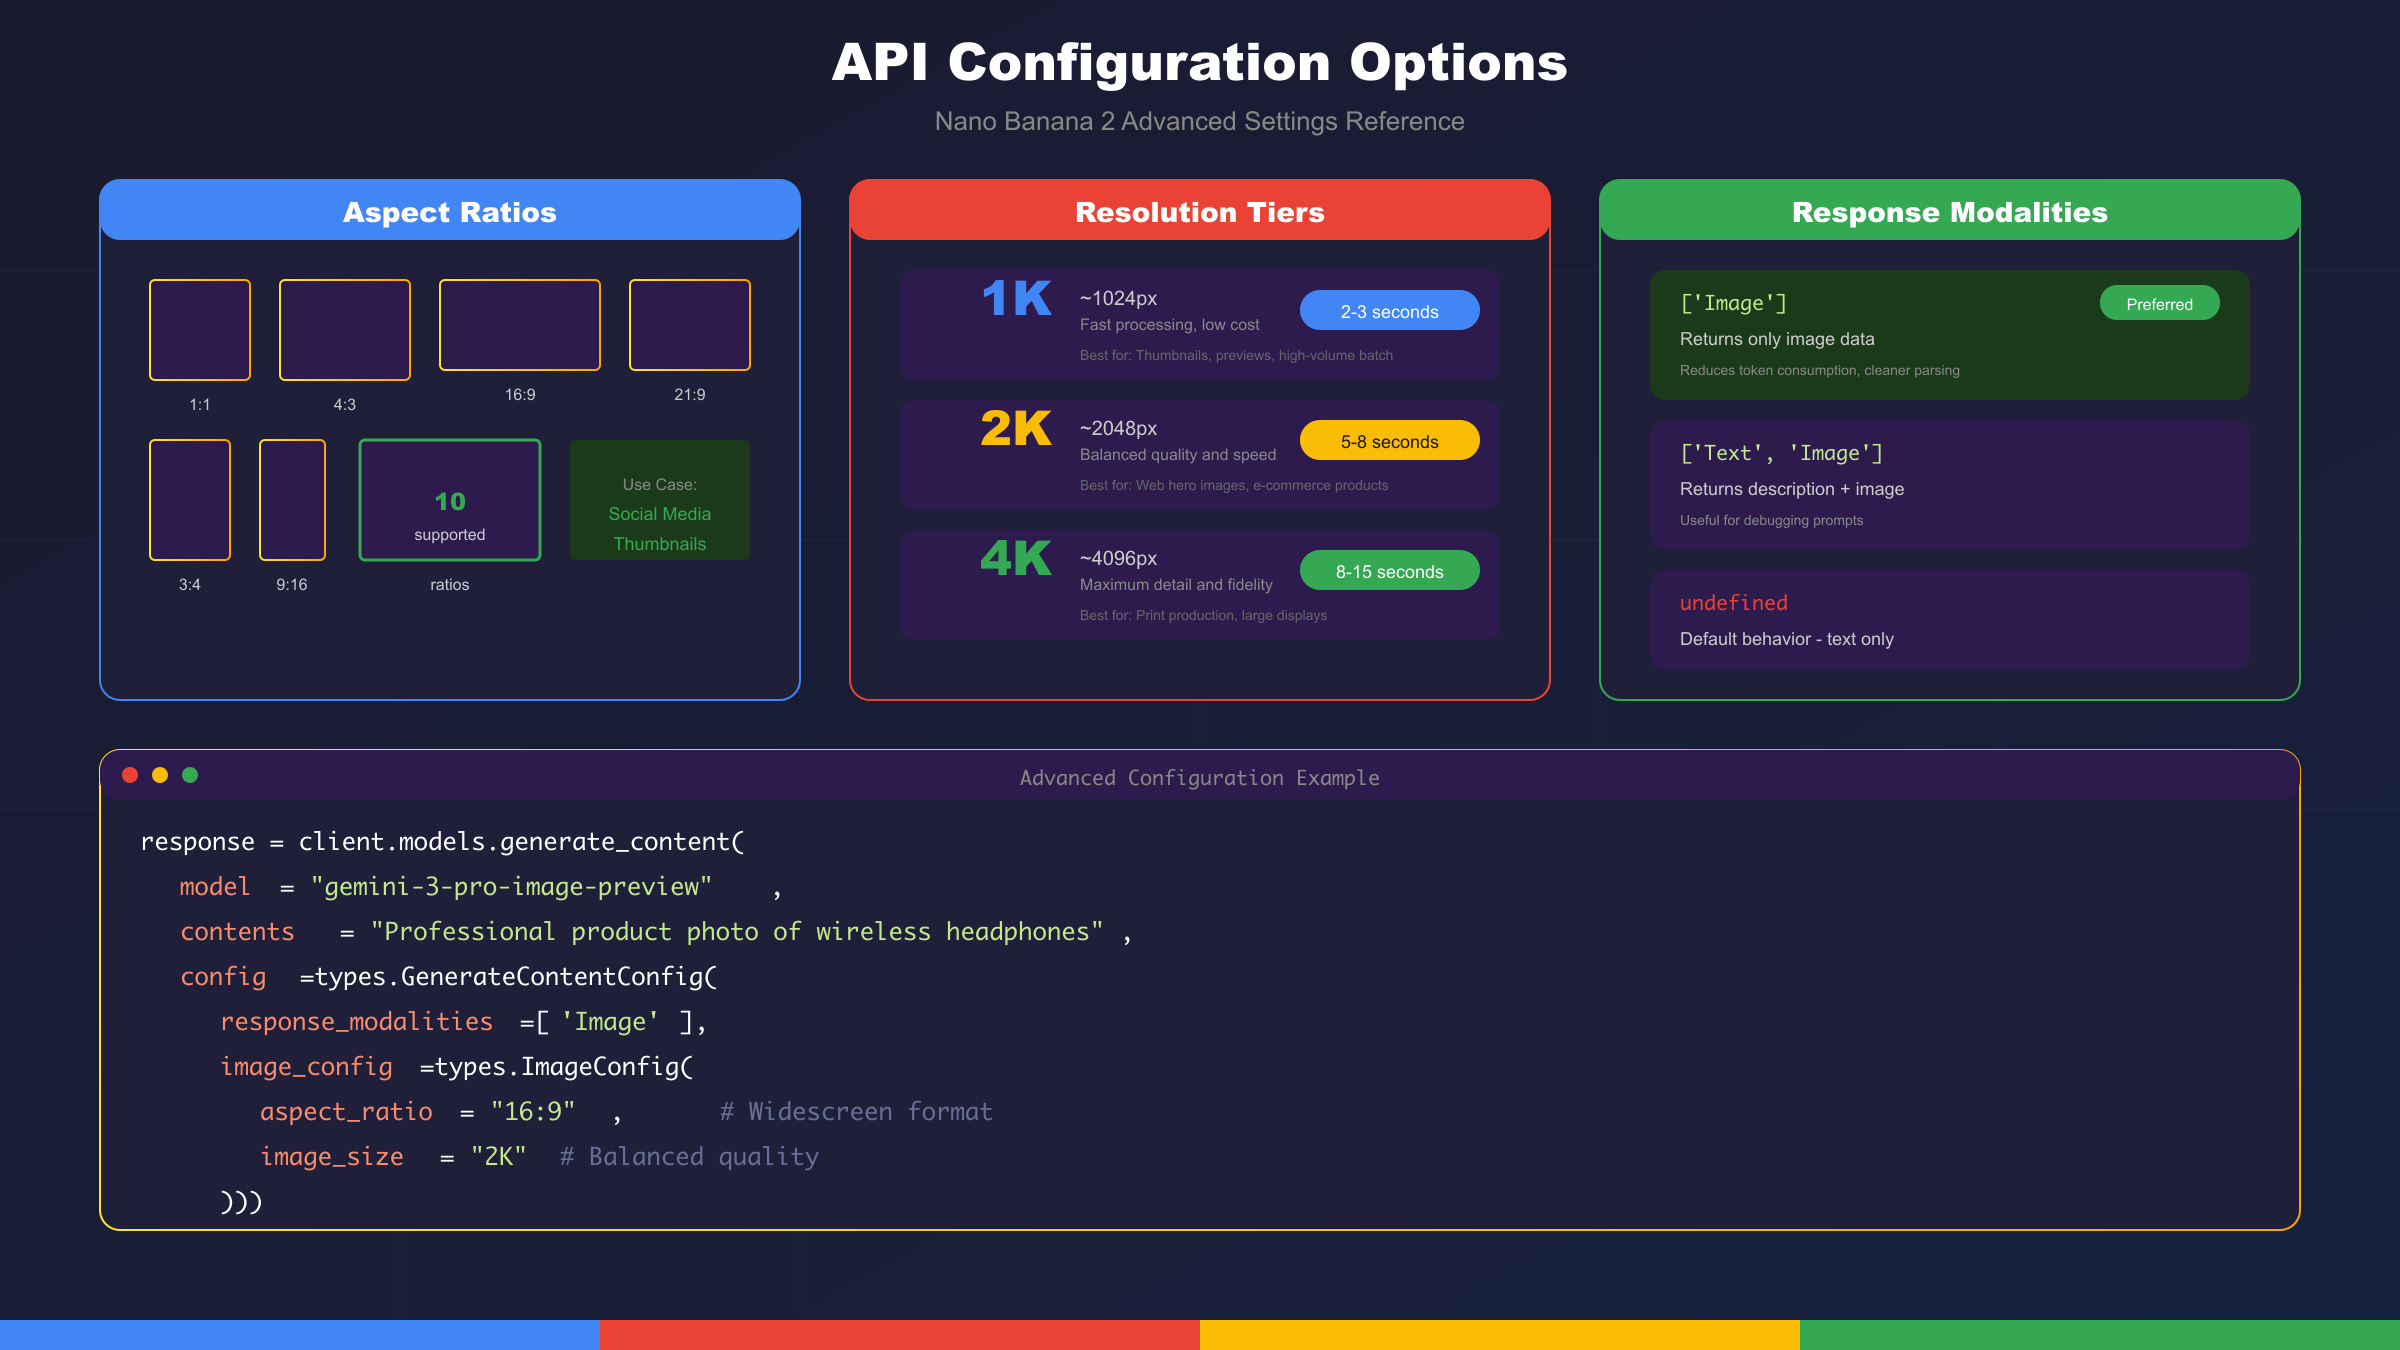
Image Editing and Multi-Modal Features
Beyond text-to-image generation, Nano Banana 2 excels at image editing tasks where you provide both an input image and instructions for modification. This capability enables workflows that combine AI generation with human creative direction.
Image-to-Image Editing
The editing workflow accepts an existing image alongside a text prompt describing desired modifications. The model understands context from the source image and applies changes while preserving elements you want to keep.
pythonfrom google import genai
from google.genai import types
from PIL import Image
from io import BytesIO
# Load source image
source_image = Image.open("product_raw.jpg")
# Request specific edits
response = client.models.generate_content(
model="gemini-3-pro-image-preview",
contents=[
"Remove the background and replace with a gradient studio backdrop",
source_image
],
config=types.GenerateContentConfig(
response_modalities=['Image']
)
)
# Save edited result
for part in response.candidates[0].content.parts:
if part.inline_data:
edited = Image.open(BytesIO(part.inline_data.data))
edited.save("product_edited.png")
Common editing operations include background removal and replacement, color adjustments, object removal, style transfer, and localized modifications to specific image regions. The model interprets natural language instructions to determine the scope and nature of changes.
Multi-Image Composition
Nano Banana 2 introduces remarkable multi-image composition capabilities, accepting up to 14 reference images in a single request. This feature enables sophisticated workflows like style transfer from multiple references, character consistency across generated images, and complex scene assembly from component parts.
python# Multiple reference images for style consistency
style_reference_1 = Image.open("brand_style_1.jpg")
style_reference_2 = Image.open("brand_style_2.jpg")
product_photo = Image.open("product.jpg")
response = client.models.generate_content(
model="gemini-3-pro-image-preview",
contents=[
"Create a marketing banner featuring this product in the visual style shown in the reference images",
style_reference_1,
style_reference_2,
product_photo
],
config=types.GenerateContentConfig(
response_modalities=['Image'],
image_config=types.ImageConfig(aspect_ratio="16:9")
)
)
The order of images in your request matters. Place style references before subject images when you want style to dominate. For subject-focused generation with subtle style influence, reverse the order. Experiment with reference ordering to achieve optimal results for your specific use case.
Character Consistency
For applications requiring consistent character representation across multiple images, Nano Banana 2 maintains identity coherence for up to 5 distinct characters. This capability proves invaluable for storyboarding, sequential art, character design exploration, and marketing campaigns featuring recurring personas.
python# Establish character with initial generation
character_prompt = """
Create a character: young woman with curly red hair,
green eyes, freckles, wearing a blue denim jacket.
Portrait style, neutral expression, clean background.
"""
character_ref = generate_image(character_prompt)
# Generate character in different scenarios
scenarios = [
"The same character reading a book in a cozy cafe",
"The same character walking through a rainy city street",
"The same character laughing at a beach during sunset"
]
for scenario in scenarios:
response = client.models.generate_content(
model="gemini-3-pro-image-preview",
contents=[scenario, character_ref],
config=types.GenerateContentConfig(
response_modalities=['Image']
)
)
# Process results maintaining character consistency
Character consistency works best when your initial reference clearly establishes distinctive features. Subsequent prompts should reference "the same character" or "this person" to trigger the consistency mechanism.
Best Practices and Troubleshooting
Production deployments demand robust error handling, efficient resource utilization, and strategies for maintaining consistent output quality. This section addresses common challenges and proven solutions.
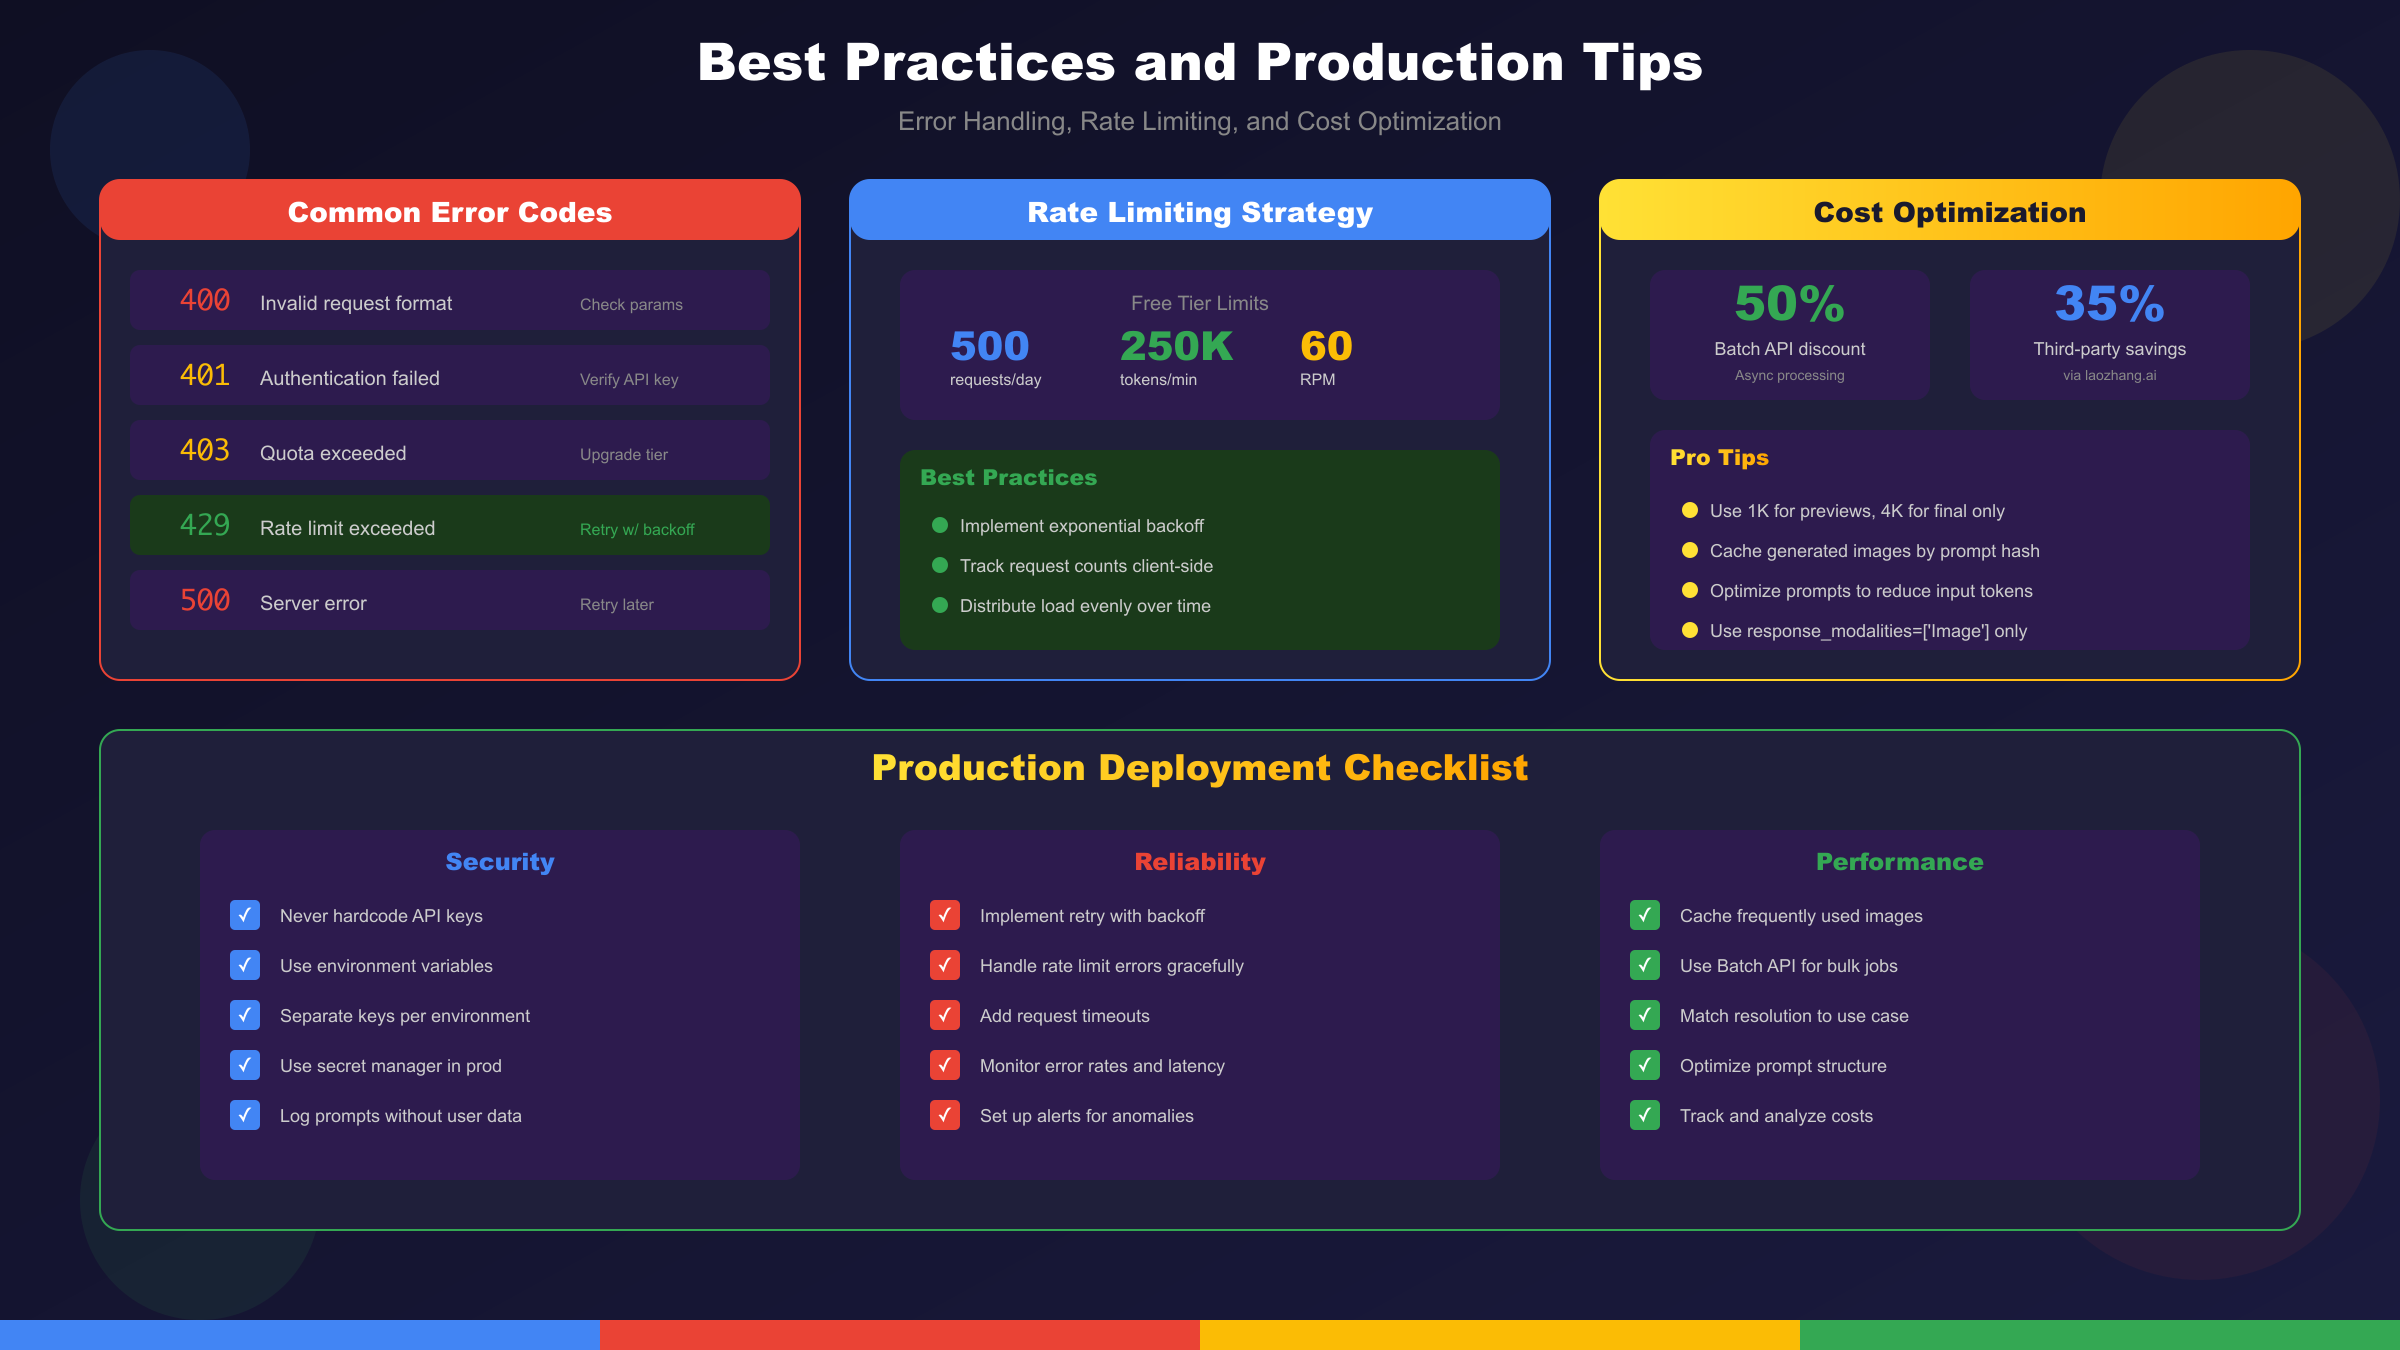
Common Errors and Solutions
The API returns structured error responses that help diagnose issues quickly. Understanding the most frequent error codes enables faster debugging and more resilient applications.
| Error Code | Meaning | Solution |
|---|---|---|
| 400 | Invalid request format | Verify prompt structure and parameter types |
| 401 | Authentication failed | Check API key validity and environment variables |
| 403 | Quota exceeded or permission denied | Monitor usage, request quota increase |
| 429 | Rate limit exceeded | Implement exponential backoff retry logic |
| 500 | Server error | Retry with backoff, contact support if persistent |
| 503 | Service temporarily unavailable | Retry after delay, check status page |
Implementing robust retry logic handles transient failures gracefully:
pythonimport time
from google.api_core import exceptions
def generate_with_retry(prompt, max_retries=3, base_delay=1):
for attempt in range(max_retries):
try:
response = client.models.generate_content(
model="gemini-2.5-flash-image-preview",
contents=prompt,
config=types.GenerateContentConfig(
response_modalities=['Image']
)
)
return response
except exceptions.ResourceExhausted as e:
if attempt < max_retries - 1:
delay = base_delay * (2 ** attempt)
print(f"Rate limited, retrying in {delay}s...")
time.sleep(delay)
else:
raise
except exceptions.ServiceUnavailable:
if attempt < max_retries - 1:
time.sleep(base_delay * 2)
else:
raise
Rate Limiting Strategies
The free tier limits requests to 500 per day and 250,000 tokens per minute. Production applications must implement strategies to operate within these constraints or upgrade to paid tiers.
Client-side rate limiting prevents hitting API limits before they occur. Track your request count and implement queuing for burst traffic patterns. For applications with predictable load patterns, distribute requests evenly across time windows rather than processing in bursts.
pythonfrom collections import deque
import time
class RateLimiter:
def __init__(self, max_requests_per_minute=60):
self.max_rpm = max_requests_per_minute
self.requests = deque()
def wait_if_needed(self):
now = time.time()
# Remove requests older than 1 minute
while self.requests and now - self.requests[0] > 60:
self.requests.popleft()
if len(self.requests) >= self.max_rpm:
sleep_time = 60 - (now - self.requests[0])
if sleep_time > 0:
time.sleep(sleep_time)
self.requests.append(now)
For developers in China or experiencing persistent rate limiting issues, laozhang.ai provides reliable API access with 99.9% uptime, 20ms latency for Asian users, and support for Alipay/WeChat payments. The multi-node intelligent routing helps avoid single-point failures that can occur with direct API access.
Cost Optimization Techniques
Optimizing API costs requires understanding token consumption patterns and adjusting strategies accordingly. Several techniques significantly reduce operational expenses.
Prompt efficiency matters because input tokens contribute to overall costs. Concise, well-structured prompts that eliminate redundancy reduce input token counts without sacrificing output quality. Develop standardized prompt templates for common operations to maintain consistency while minimizing token waste.
Resolution selection should match actual requirements. Generating 4K images when 1K suffices wastes resources. Implement tiered quality selection based on intended use, generating preview images at lower resolution and upscaling only final selected assets.
Caching prevents redundant generation. Store generated images with their prompts as keys, serving cached results for identical requests. This pattern proves especially valuable for applications with recurring queries or shared asset libraries.
pythonimport hashlib
import json
from pathlib import Path
class ImageCache:
def __init__(self, cache_dir="./image_cache"):
self.cache_dir = Path(cache_dir)
self.cache_dir.mkdir(exist_ok=True)
def get_cache_key(self, prompt, config):
content = json.dumps({"prompt": prompt, "config": str(config)})
return hashlib.md5(content.encode()).hexdigest()
def get(self, prompt, config):
key = self.get_cache_key(prompt, config)
cache_path = self.cache_dir / f"{key}.png"
if cache_path.exists():
return Image.open(cache_path)
return None
def set(self, prompt, config, image):
key = self.get_cache_key(prompt, config)
cache_path = self.cache_dir / f"{key}.png"
image.save(cache_path)
Production Deployment Recommendations
Moving from development to production requires attention to reliability, monitoring, and operational concerns beyond the API integration itself.
Environment separation ensures production systems remain stable while development continues. Maintain separate API keys for development, staging, and production environments. Configure different rate limits and error handling behaviors appropriate to each environment's purpose.
Monitoring provides visibility into API performance and usage patterns. Track request latency, error rates, token consumption, and cost metrics. Set up alerts for unusual patterns that might indicate issues requiring attention.
Logging should capture sufficient detail for debugging without exposing sensitive data. Log prompt summaries rather than full prompts that might contain user data. Record request IDs for correlation with API provider logs when investigating issues.
Conclusion
The Nano Banana 2 API represents a significant advancement in accessible AI image generation technology. Through this tutorial, we have explored the complete development lifecycle from initial setup through production deployment, covering the essential concepts and practical techniques needed for successful integration.
Key takeaways from this guide include understanding the distinction between Nano Banana (Gemini 2.5 Flash Image) and Nano Banana 2 (Gemini 3 Pro Image), each serving different use cases based on speed versus quality requirements. The configuration options including aspect ratio, resolution, and batch processing enable optimization for specific application needs. Multi-modal capabilities like image editing and character consistency open creative possibilities beyond simple text-to-image generation.
For production deployments requiring reliable access, cost optimization, and unified API access to multiple AI models, laozhang.ai offers Nano Banana API at $0.025 per image, representing significant savings compared to direct access. The platform provides a consistent interface across 200+ models, simplifying development when your application needs to work with multiple AI services.
The field continues to evolve rapidly, with Google regularly updating model capabilities and adding new features. Stay current by monitoring the official Gemini API documentation and testing new preview releases as they become available. The patterns and practices covered in this tutorial provide a solid foundation that adapts as the technology progresses.
For related tutorials and guides, explore our coverage of Gemini 2.5 Flash Image API for deeper dives into the original Nano Banana model, free Nano Banana access options for development and testing, and the comprehensive Nano Banana 2 free usage guide for maximizing free tier allocations across multiple platforms.